
Your cart is currently empty!
Introduction:
Does your pantry somehow become a dumping ground for half-open snack bags, random cans, forgotten sauces, and things you swear you bought months ago?
You don’t need an entire Saturday, dozens of matching containers, or a picture-perfect walk-in pantry to fix it. With a few smart changes, you can make your pantry easier to use in about 30 minutes.
The trick is to stop organizing everything simply by appearance and start organizing it around how you actually use your kitchen.
1. Start With the Dead Corners
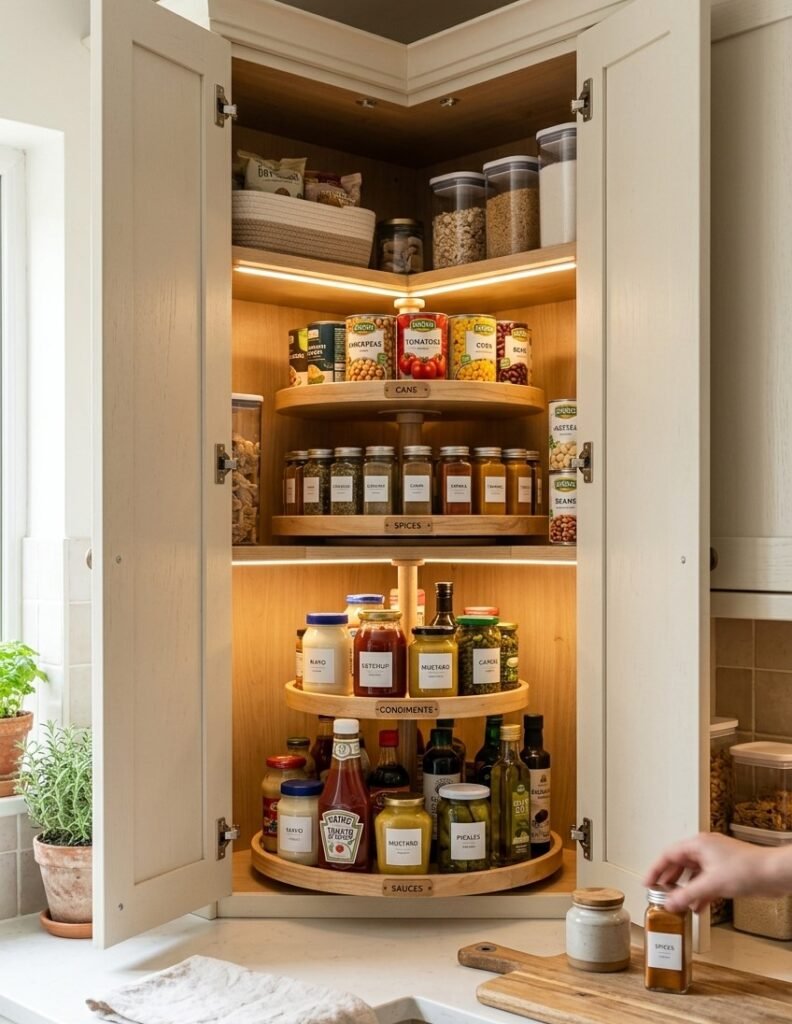
First, look for the spots you almost never reach. Deep corners are notorious for swallowing jars, cans, and bottles until you completely forget they’re there.
Instead of stacking everything behind everything else, use a rotating lazy Susan for smaller bottles and jars.
Try grouping:
- Sauces and condiments
- Cooking oils
- Canned goods
- Small jars
- Frequently used ingredients
Now you can simply spin the tray instead of pulling six bottles out to reach one hiding in the back.
2. Give Open Snacks Their Own Home
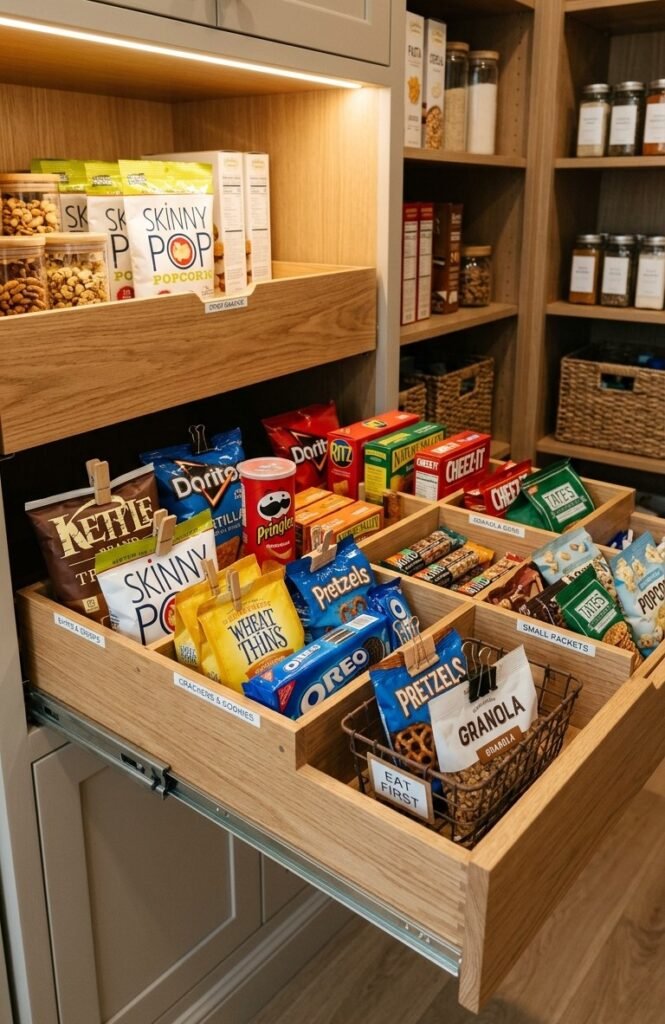
Here’s a small problem that creates surprisingly big messes: opened snack packages.
An opened bag of crackers gets pushed backward. A new bag gets placed in front. Then another one appears, and suddenly nobody knows which package should be eaten first.
Put opened or nearly finished snacks inside it:
- Opened crackers
- Chips
- Cookies
- Granola
- Snack packets
- Partially used breakfast foods
Keep this basket somewhere visible and easy to grab. When someone wants a snack, they’ll naturally check there first.
It’s a tiny system, but it can make a messy pantry feel dramatically more controlled.
3. Use Your Vertical Space
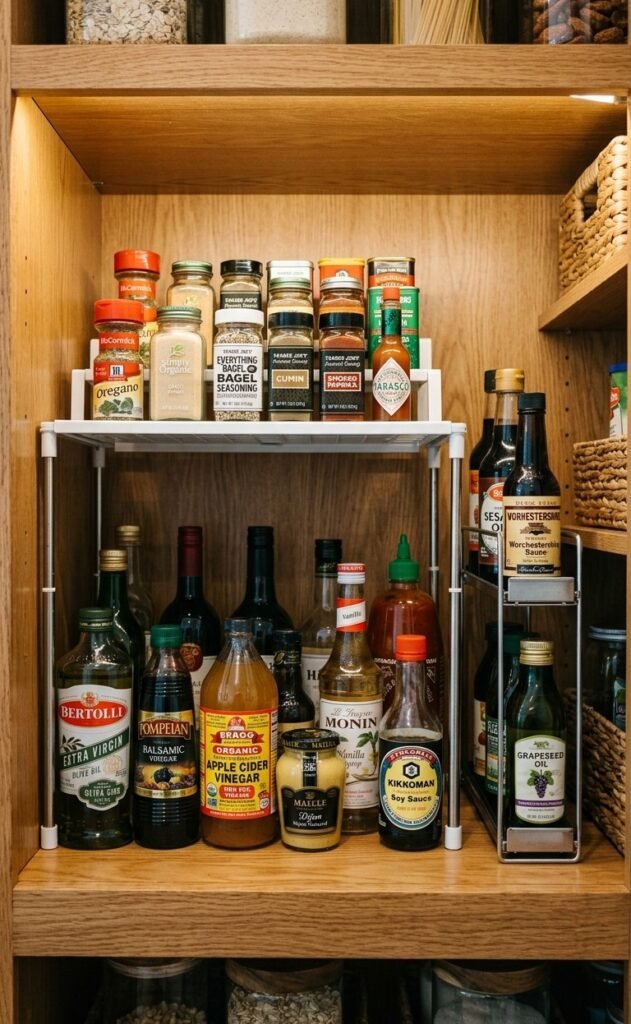
Look at your pantry shelves. Are there huge gaps above short jars while taller bottles are awkwardly squeezed somewhere else?
That’s wasted space.
A simple shelf riser can turn one shelf into two levels. Put shorter items on the raised section while keeping taller bottles underneath.
For example:
Top: spices, small jars, seasoning containers
Bottom: oils, syrups, vinegar, cooking bottles
You don’t necessarily need more shelves. Sometimes you just need to use the shelves you already have more intelligently.
4. Create a Backstock Zone
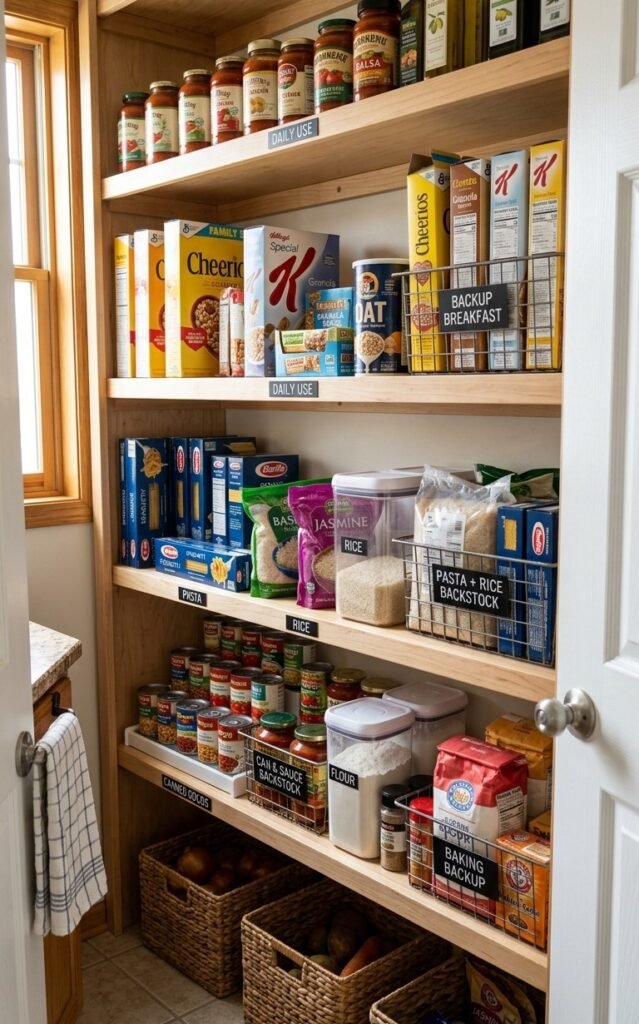
Have you ever bought another box of pasta only to discover you already had three?
That’s exactly why a backstock zone is useful.
Keep unopened extras together in a basket or designated section toward the back of your pantry. Your everyday items stay toward the front.
Try creating simple categories such as:
- Breakfast
- Snacks
- Pasta + rice
- Canned foods
- Baking
- Backups
This makes grocery shopping easier too because you can quickly see what you already have.
5. Stop Letting Packets Become a Pile
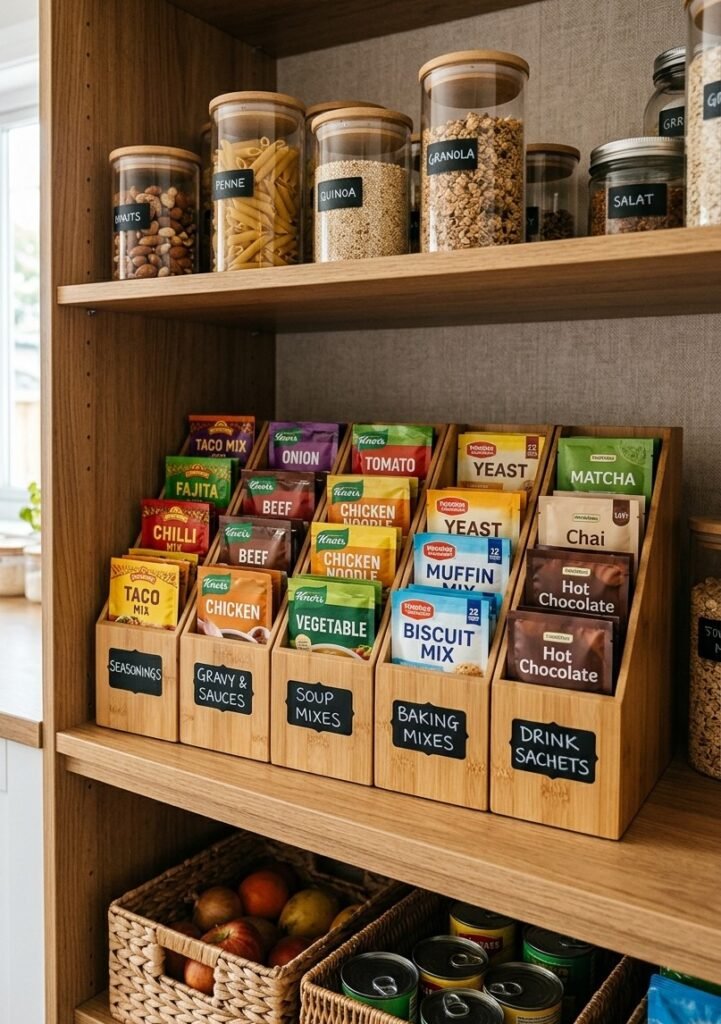
Small seasoning packets, soup mixes, gravy packets, and baking sachets are some of the easiest things to lose.
Instead of throwing them into a drawer or basket, store them vertically like files in an office organizer.
Use narrow containers and separate them into categories:
- Seasonings
- Soup mixes
- Sauces
- Baking mixes
- Drink packets
Because the packets stand upright, you can actually see what you have.
This is especially useful when you have a narrow shelf or an awkward little section of the pantry that isn’t deep enough for regular bins.
6. Build a Grab-and-Go Breakfast Zone
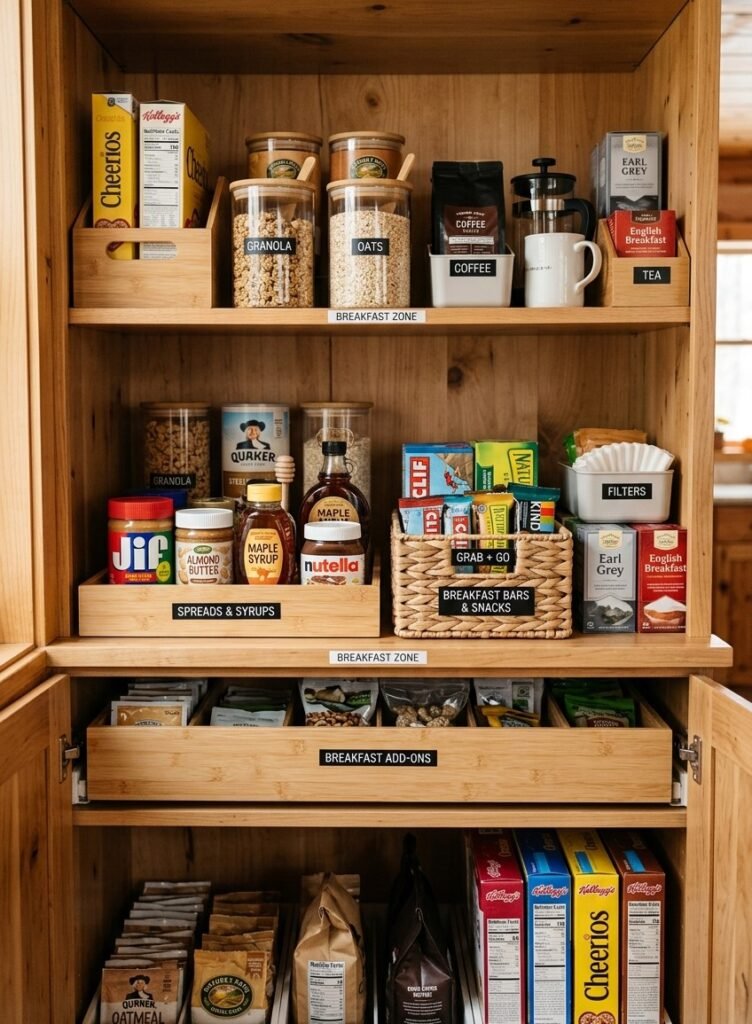
If mornings are chaotic, don’t make breakfast ingredients hunt for themselves.
Create one small breakfast station where the most-used items live together.
Keep things like:
- Cereal
- Oats
- Breakfast bars
- Pancake mix
- Honey
- Spreads
- Coffee or tea supplies
Put the things you reach for every morning at eye level. Less-used backup products can go underneath.
7. Fix the Can Avalanche
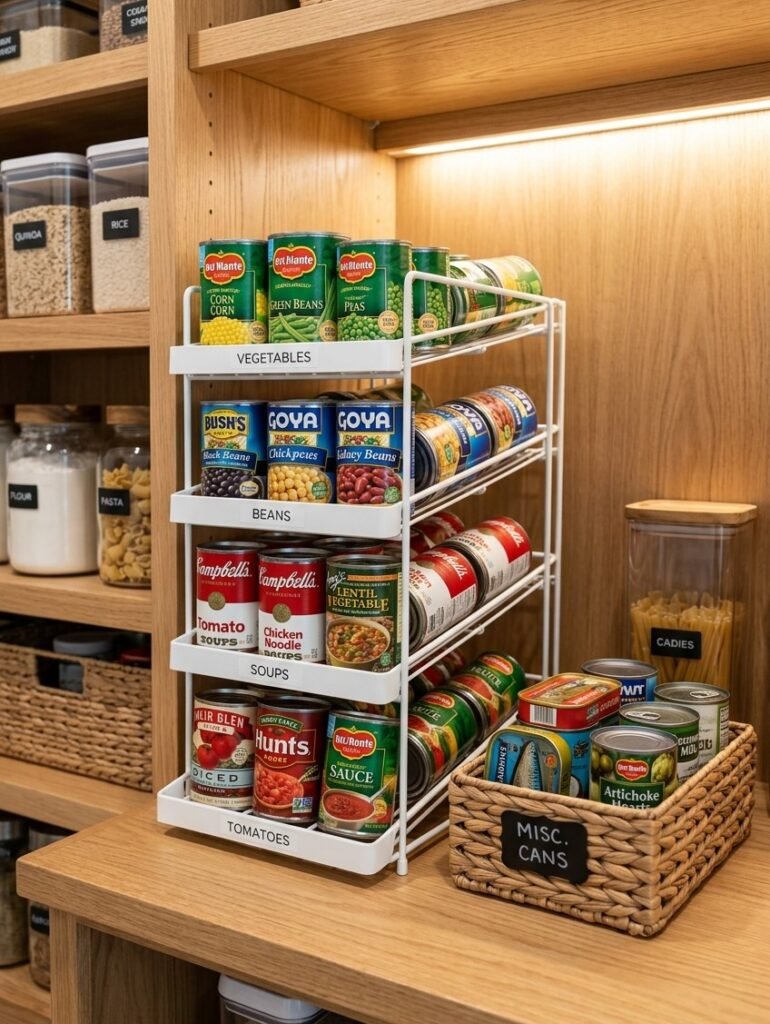
Cans don’t need to be stacked into a precarious tower.
If you have a lot of canned food, use a tiered can organizer or gravity-fed dispenser so the cans remain visible and easy to grab.
Group similar foods together:
- Vegetables
- Beans
- Soups
- Tomatoes
- Fruit
The important part is keeping labels facing forward.
8. Don’t Ignore the Pantry Door
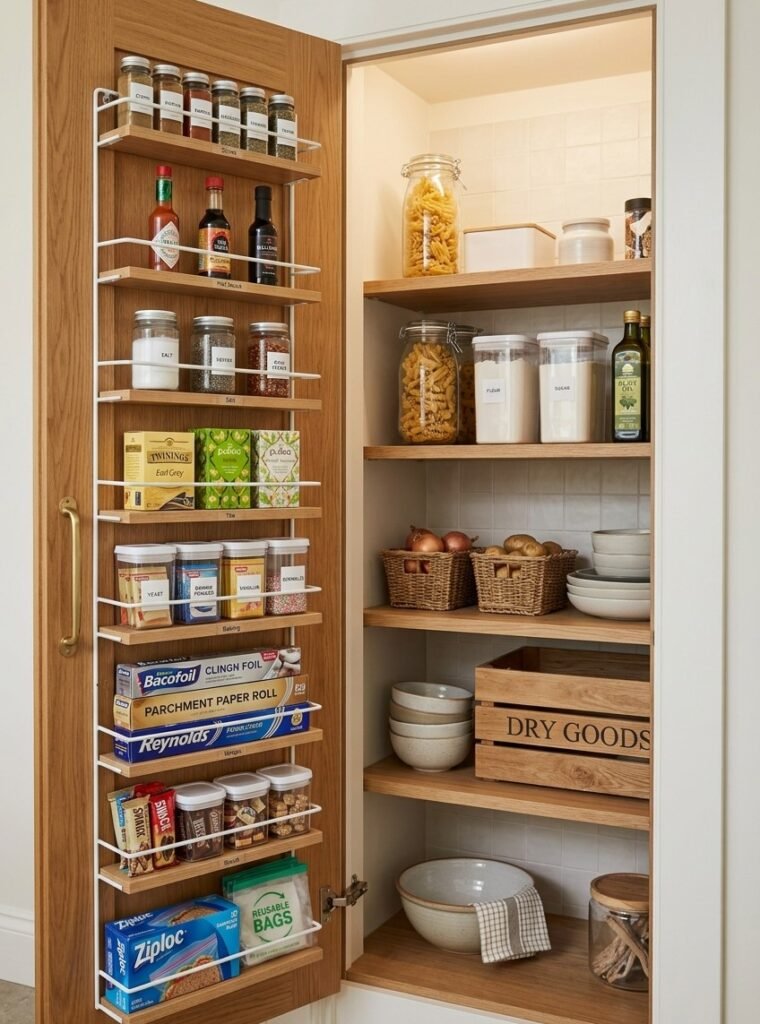
Here’s one of the most overlooked storage areas: the inside of the pantry door.
A slim door organizer can hold lightweight items that don’t need much depth.
Think:
- Spices
- Small sauces
- Tea boxes
- Seasoning packets
- Foil
- Sandwich bags
- Baking supplies
Just be careful not to overload the door with heavy items.
9. Create a “Use First” Basket
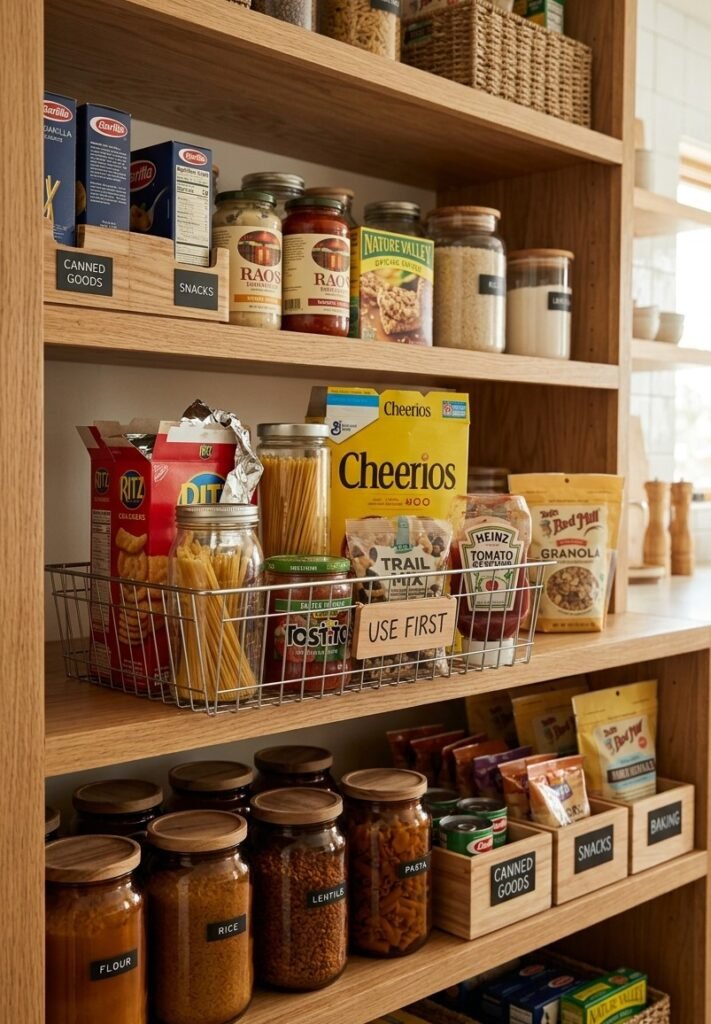
Even an organized pantry can waste food if older items disappear behind newer ones.
That’s why a small Use First basket is worth adding.
Place foods inside that need attention soon, such as opened packages or ingredients you’re close to finishing.
When you’re deciding what to cook or snack on, check this basket first.
10. Finish With a 30-Minute Pantry Reset
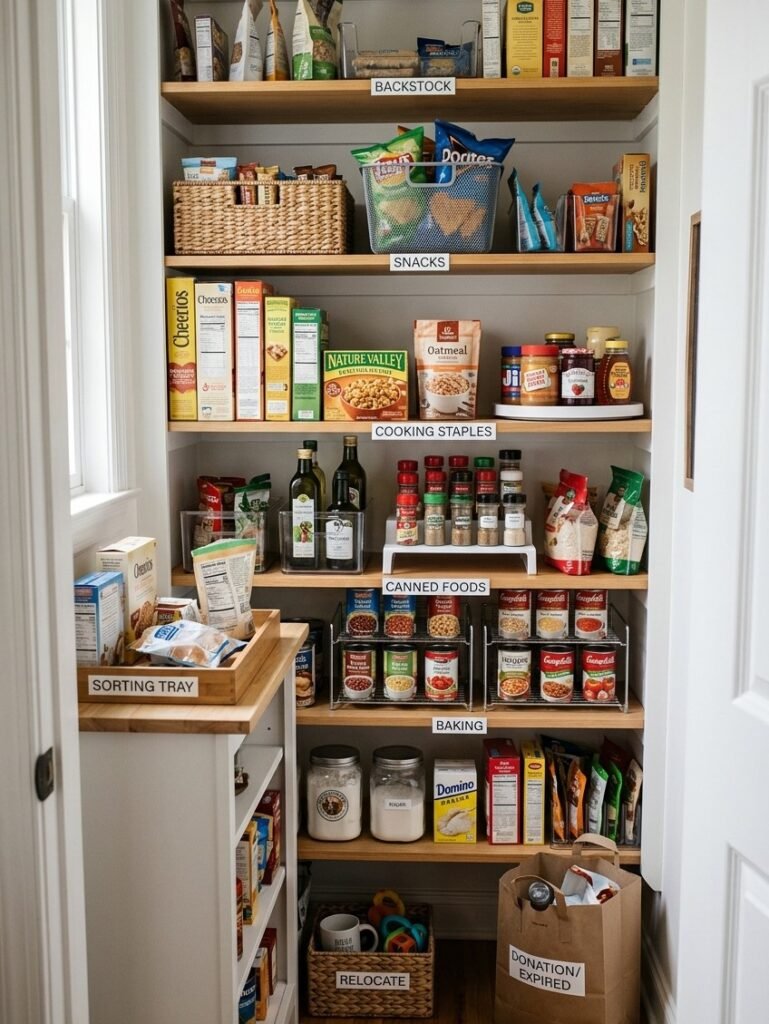
You don’t need to pull every single item out and create a giant kitchen disaster.
Instead, set a timer for 30 minutes and work quickly.
Your 30-minute reset:
Minutes 1–5:
Remove expired food, empty packages, and obvious trash.
Minutes 6–10:
Group similar foods together.
Minutes 11–15:
Move everyday items toward the front and backups toward the back.
Minutes 16–20:
Add simple organizers such as shelf risers, baskets, or a lazy Susan where they’re actually useful.
Minutes 21–25:
Create your Eat First and Backstock zones.
Minutes 26–30:
Straighten labels, wipe shelves, and return anything that belongs somewhere else.
And that’s it.
💡 Pro Tip: Don’t organize before you declutter.
If you start buying bins for things you don’t actually use, you’re just creating prettier clutter. Remove expired, unwanted, and duplicate items first. Then organize what’s left.
A Pantry That Actually Works
If your pantry looks like mine did last year, the problem probably isn’t that you don’t have enough storage. It’s that the storage isn’t working with your habits.
Once frequently used foods are easy to reach, opened foods have a visible home, and backups are separated from everyday items, maintaining the pantry becomes much easier.
And the best part? You don’t have to finish everything perfectly today.
Set a 30-minute timer, pick one shelf, and start there. By the time the timer goes off, you’ll probably have a pantry that’s noticeably easier to use.
Categories: Home Decor


Leave a Reply